Digital cameras are all over the place these days and it is so easy to take tons of pictures. Digital cameras let you see the picture you took seconds after it was taken. You can then determine if the picture is a “keeper” or not. But how do you determine the “keepers” and how do you set up a great shot that will be appreciated years down the road?
There are a few simple tips when taking pictures of family members to keep in a family history book or file.
Photo Tip #1: Zoom In
Your pictures will look ten times better if you zoom in or get closer to the person you are photographing. By taking a picture that encapsulates your subject head-to-toe, you lose a lot of facial detail and expression. If your subject is not a body builder or super model, they’ll probably appreciate a facial portrait rather than a full body shot.
Full shots are great, and you’ll definitely want some in your collection, but for family history purposes, you’ll probably want to capture more the essence and expression of your family member/subject.
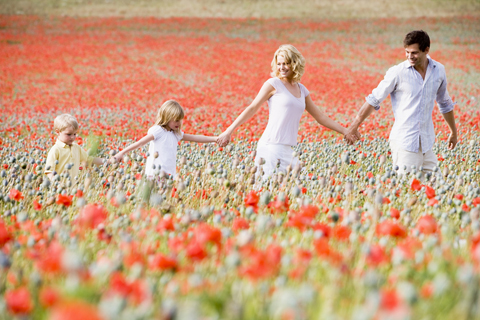
For instance, the photo below is a great artistic photo. It makes good use of “depth of field” and is a fun composition with the flowers and the family holding hands.

It’s a great photo, no doubt about it. However, if you take a look at the picture below, you’ll see why zooming in or moving in closer to your subject greatly enhances the picture. There’s no fancy foreground or background in the picture (there’s actually no background), but you can really get a sense for the people in the picture.

Your pictures will instantly look better if you just move in a little closer. You’ll also avoid the “I-feel-uncomfortable-standing-in-front-of-the-camera-and-I -don’t-know-what-to-do-with-my-arms-syndrome.” How many times have you posed for a picture and just felt uncomfortable the way you were standing? You just didn’t feel natural and didn’t know what to do with your arms…at the side, folded, hands in pockets, etc. (One way to avoid this is to put weight on one foot and not equally on both.)
Photo Tip #2: Get Good Light
Too bright, and your pictures will be washed out, too dark, and you won’t be able to see anything–lighting is key to taking a good picture. Taking pictures outside in the morning and evening hours provides good natural light. Taking pictures at noon and early afternoon makes lots of unhappy squinters. Go for soft, natural light. If you have to take pictures during the day, try placing your subject in the shade.
Try different angles. The light can come from the side. If you have a removable or adjustable flash, try bouncing the flash off the ceiling or from the side. This will help eliminate harsh shadows behind the subject.
Photo Tip #3: Compose In 3rds
You don’t always have to place your subject smack-dab in the center of the picture. Put them to the right or left side of the frame. It will ad variety and a different dynamic into the picture.
Photo Tip #4: Small Group Shots
If you’re taking pictures of a group, you normally have to scoot way back to fit everyone into the frame. That’s fine for a single shot, but try taking pictures in smaller groups and zooming in on the faces of the individuals (see tip #1). If it’s a family picture, take the group shot, and then split the group up by taking a picture of the parents with each child. You’ll also want a picture of just the parents alone and each child alone. It’s great to have sister, uncle, brother, cousin, etc. in the pictures, but a few generations down the road, descendants will be mostly interested in the individual they are most closely related to.
Since digital pictures really don’t cost anything (unless you print them), go ahead and take a bunch. Your posterity will thank you.
That should be enough to get you started, but once you have your pictures, remember to organize them and name them.
